Updated: 13-May-2018
Introduction
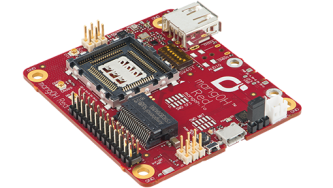
To develop for the mangOH Red board, you can use an Ubuntu-based virtual machine, provided by the mangOH team. It turns out that I prefer Linux Mint to Ubuntu, mainly because of the window manager, and I wanted to start trying to understand how the mangOH development environment is structured and works. So I decided to set up my own development VM, based on Linux Mint.
In this article, I describe the various steps I followed to create this VM.
The host machine I use is a MacBook running macOS High Sierra, but provided explanations can be easily adapted to a Linux host, or to a Windows host.
You don’t need to be an expert in Linux nor in virtual machines to perform operations described below, as I tried to provide detailed information. Nevertheless, having a first experience is a good thing. And anyway, if you plan to develop for a mangOH board, you’ll need this experience 🙂
Creation of the VM
- install VirtualBox and VirtualBox Extension Pack
- download Linux Mint. I’ll use the 18.3 MATE 64-bit version
- verify downloaded ISO image:
shasum -a 256 linuxmint-18.3-mate-64bit.iso
- from VirtualBox, create a new VM: click on New, and specify following characteristics:
- Name:
mangoh(for instance) - Type:
Linux - Version:
Linux 2.6 / 3.x / 4.x (64-bit) - Memory size:
4096 MB(adapt to your host memory) - Hard disk:
Create a virtual hard disk now - Hard disk file type:
VDI - Storage on physical hard disk:
Dynamically allocated - File location and size: keep default value for location or adapt it, use 30 GB for size, or adapt
- Name:
- once the new VM slot is displayed in the list of VMs, select it and click on Settings then:
- click on Ports then USB and select USB 3.0
- click on OK button
- now click on Start then:
- select the Linux Mint ISO file and click on Start button
- close the message windows about keyboard and mouse integration
- wait for Linux Mint to boot
- in VirtualBox VM menu bar, click on View and then on Full-screen Mode
- in the dialog box that appears, check which key is the host key on your host system (on the MacBook, that’s
Left-cmd). You can use thehost+Fkey combination to switch to/from full-screen mode. Click on the Switch button - increase Linux Mint display definition, thanks to Menu / Control Center / Displays, selecting
1024 x 768for instance. This will make the installation process easier - double click on Linux Mint Install icon and then:
- select language
- check Install third-party software…
- keep selected Erase disk and install Linux Mint
- accept disk partitioning
- select your time zone
- select keyboard layout. For my MacBook, that’s French / French – French (Macintosh)
- set Your name to
mangoh, keep proposed computer’s name and username, usemangohfor password - accept the restart, at the end of the installation, and press the
Enterkey when requested
Configuration of the VM
- after the reboot, perform a Linux update, by clicking on the Update Manager icon, on the right-hand side of the bottom panel (a white i letter on a blue circle in a kind of shield). Select Let me review sensitive updates. Requested password is the one defined previously (
mangoh) - from the VirtualBox VM menu, click on Devices / Insert Guest Additions CD image… and accept to run the application. Password is still the same one
- from the VirtualBox VM menu, click on Devices / Shared Clipboard and select Bidirectional
- from the VirtualBox VM menu, click on Devices / Shared Folders / Shared Folders Settings… Select a host machine folder (it will be shared with the VM) and provide a name for the associated guest device (Folder Name),
sharedFolderfor instance. Check Auto-mount and Make Permanent - start a terminal (Menu / Terminal) and run following command:
sudo adduser mangoh vboxsf
# This grants you read/write access to the shared folder
- eject the virtual CDROM that have been added to the desktop by the guest additions: right-click on it and select Eject
- reboot (Menu / Quit / Restart)
- start the Package Manager via Menu / Package Manager, and type
modemmanagerin the Quick filter input field. In the list of packages that is displayed as a result, right-click onmodemmanagerand select Mark for Complete Removal. Then click on Apply tool (if modemmanager is not removed, Linux Mint will try to use the mangOH board as a 3G modem) - still from the Package Manager, install emacs (or your preferred text editor) (select for installation and apply)
- exit from the Package Manager
- right-click on the bottom panel and select Add to panel… Click on System Monitor and then on Add button. Close the Add to Panel window
- right-click on the icon that was just added to the panel and select Preferences. Check Memory and Network, and close the window. This applet will provide you with information about processor and memory use, and network traffic, in real-time
- in Menu / Control Center / Screensaver, uncheck Lock screen when screensaver is active
Installation of the development environment
The mangOH Red Getting Started Guide is used as reference. All steps below are to be performed in the VM.
Dependencies
- install dependencies:
sudo apt-get install -y \
    build-essential \
    lib32z1 \
    lib32ncurses5 \
    cmake \
    git \
    ninja-build \
    repo \
    python-jinja2 \
    python-git \
    texinfo \
    chrpath \
    libxml2-utils \
    gcovr \
    libcurl4-gnutls-dev \
    zlib1g-dev \
    libbz2-dev \
    bsdiff \
    libssl-dev \
    dh-autoreconf
Module firmware and toolchain
- on Sierra Wireless Source page, in Devices / Airprime section, select the module inserted in the mangOH Red socket. Mine is a WP8548, and following instructions will refer to it
- login (create a Source account, if you don’t already have one)
- in the Software download section, click on Firmware
- in the Firmware Update Instructions for Legato CLI users (Linux), click on R15 (Generic — GCF). Download of
WPx5xx_Release15_GENERIC_SPK.spkfile starts - create a folder named
WP_Module_Firmware, and move the above file to it:
mkdir ~/WP_Module_Firmware
mv ~/Downloads/WPx5xx_Release15_GENERIC_SPK.spk ~/WP_Module_Firmware/
- in the Release Content section, click on WP8548 & WP75xx Firmware Release 15 Components
- in the Rebuild Linux Distribution section, click on 64-bit ToolChain. Download of toolchain starts. File name is
poky-swi-ext-glibc-x86_64-meta-toolchain-swi-ext-armv7a-vfp-neon-toolchain-swi-ext-1.7.3.sh. Associated Legato Distro Source version, displayed in the section, isSWI9X15Y_07.12.14.00 - install the toolchain, from within the folder where the file has been downloaded:
sudo ./poky-swi-ext-glibc-x86_64-meta-toolchain-swi-ext-armv7a-vfp-neon-toolchain-swi-ext-1.7.3.sh
- when asked for target directory, add the Legato Distro Source version to the name of the default directory. For me, this gives:
/opt/swi/y17-ext-SWI9X15Y_07.12.14.00 - create a symbolic link to the above folder for your module. For me:
cd /opt/swi
sudo ln -f -s y17-ext-SWI9X15Y_07.12.14.00 y17-ext-wp85
- run kernel build scripts:
export PATH=/opt/swi/y17-ext-wp85/sysroots/x86_64-pokysdk-linux/usr/bin/arm-poky-linux-gnueabi:$PATH
cd /opt/swi/y17-ext-wp85/sysroots/armv7a-vfp-neon-poky-linux-gnueabi/usr/src/kernel/
sudo chown -R $USER .
ARCH=arm CROSS_COMPILE=arm-poky-linux-gnueabi- make scripts
sudo chown -R root .
- download and install swiflash, the tool that allows to flash images into the WP8548 module:
wget http://updatesite.sierrawireless.com/swiflash/swiflash_latest.deb -O ~/Downloads/swiflash_latest.deb
sudo apt-get install ~/Downloads/swiflash_latest.deb
MangOH development environment
Proceed as explained here. For me:
- get Legato Application Framework source code:
# Set git identity
git config --global user.email ""
git config --global user.name ""
# Install Legato framework
cd ~
mkdir legato_framework
cd legato_framework
repo init -u git://github.com/legatoproject/manifest -m \
    legato/releases/18.04.0/legato.xml
repo sync
- get mangOH platform source code:
cd ~
git clone --recursive git://github.com/mangOH/mangOH
- add following lines to
.bashrcfile:
export LEGATO_ROOT=~/legato_framework/legato
export WP85_SYSROOT=/opt/swi/y17-ext-wp85/sysroots/armv7a-vfp-neon-poky-linux-gnueabi
alias cfglegato="pushd . && cd ~/legato_framework/legato && source ./bin/configlegatoenv ; popd"
- close the terminal, open a new one. Above environment variables are now defined
- build Legato Application Framework and mangOH platform for the mangOH Red and WP8548 target:
cd ~/mangOH
make red_wp85
MangOH board setup
Proceed as explained here. For me:
- set following DIP switches to ON: 1, 3, 8. Documentation says that 5 should be set to ON as well, but as it relates to the backup battery and I don’t have one
- ensure the SIM card is inserted in its slot
- connect the main antenna and the GNSS antenna
- set the Power Header jumper on the pair of pins that are close to the CF3 USB port
- connect the CF3 USB port to the development computer, with provided cable
VM configuration for the board
- ensure that the mangOH board is on: the green power LED must be on
- ensure that the board is seen by the host OS. On the MacBook, I check that a ping to 192.168.2.2 returns an answer. On Linux, you can also use the lsusb command
- on VirtualBox VM menu, click on Devices / USB. The board should be listed as
Sierra Wireless, Incorporated WP8548 [0006] - click on it. This transfers the USB connection management from the host computer to the virtual machine. Make the transfer permanent with Devices / USB / USB Settings…: add an USB device filter for the board – Note: further testing shows that on my MacBook the transfer is not permanent 🙁 Consequently, every time the USB connection is reinitialized (typically, when the board reboots), I have to manually reattach the USB device to the VM
- ensure that the board is now seen by the VM:
ping 192.168.2.2
#
# Reply should be:
#
# PING 192.168.2.2 (192.168.2.2) 56(84) bytes of data.
# 64 bytes from 192.168.2.2: icmp_seq=1 ttl=64 time=1.20 ms
# ...
# use CTRL+C to exit from the command
#
Board firmware update
- update the board module with the firmware previously downloaded:
cd ~/WP_Module_Firmware
swiflash -m WP85XX -i WPx5xx_Release15_GENERIC_SPK.spk
#
# Reply should be:
#
# Detecting USB of the target
# DONE
# Communicating with the target
# DONE
# Switching to firmware download mode
# .......................................DONE
# Downloading the firmware
# ....................DONE
# Rebooting the module
# ...........DONE
# Firmware Download SUCCESS
#
Given the fact that the USB attach is not automatic (see above), I had to manually reattach the board to the VM twice during firmware update: during the switch to firmware download mode, and after module reboot.
- connect to the board, and display firmware information:
ssh root@192.168.2.2
#
# Replay "yes" to the displayed message:
#
# The authenticity of host '192.168.2.2 (192.168.2.2)' can't be established.
# RSA key fingerprint is SHA256:<aString>.
# Are you sure you want to continue connecting (yes/no)? yes
#
# The above message is displayed at the first connection only.
#
# Keep the "no password" configuration:
#
# Linux swi-mdm9x15 3.14.29ltsi-13c67b16ff_922830eb31 #2 PREEMPT Fri Apr 15 02:38:16 PDT 2016 # armv7l GNU/Linux
#
# It is strongly recommended to setup credentials for remote login.
# Please select one of the following options:
#  1) Setup ssh keys and disable passwords-based authentication via ssh
#     (the most secure)
#  2) Setup password (better than nothing)
#  3) Do nothing
3
#
# Would you like a reminder next time you log in [Y/n]?
#
# OK, I will remind you next time.
#
# Request firmware information:
#
cm info
#
# Answer for firmware is:
# Firmware:   SWI9X15Y_07.12.14.00 r34472 CARMD-EV-FRMWR1 2017/11/29 18:24:42
# Bootloader: SWI9X15Y_07.12.14.00 r34472 CARMD-EV-FRMWR1 2017/11/29 18:24:42
#
- install embedded part of mangOH Red platform:
#
# Define required environment variables and commands:
#
cfglegato
#
# Install platform:
#
update ~/mangOH/build/update_files/red/mangOH.wp85.update 192.168.2.2
#
- reconnect to the board (
ssh...), and execute theapp statuscommand. You should find theredSensorToCloudapplication in the returned list.
That’s it: the development environment is ready.
For more information, you can refer to following documents:
Limitations
- the MediaTek mt7697 SDK is not installed.
Developer Studio is not installed.Check this article to install and configure Developer Studio.