This post explains how to start using a mangOH Green board, and to connect it to Sierra Wireless AirVantage. Some knowledge of Linux OS is required.
mangOH, Legato and AirVantage documentation is good, so I won’t provide all details. My aim is more to provide a broad view, so that you know how to use the existing documentation.
Reference material
- mangOH website
- mangOH Green User Guide
- mangOH Green Developer Guide
- Legato website
- Legato documentation
- Legato forum
- Developer Studio 5 Install Instructions
Getting started
Board setup
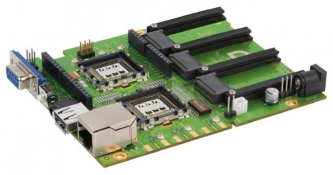
The mangOH Green board I use is equipped with a WP8548 module.
Following instructions from mangOH Fundamentals guide:
- insert the SIM card
- connect the GNSS antenna and the cellular network antenna
[a few words about GNSS acronym: it means Global Navigation Satellite System, and refers to any satellite-based system providing location information through a receiving device. GPS is one GNSS system. GLONASS, Beidou, Galileo are other GNSS systems.]
- set the power select jumper to select DC power
- connect the board to the computer using the micro-USB cable
- connect the power adapter
Legato Development Environment installation
The computer I use runs Linux Mint 18.1, based on Ubuntu 16.04. More precisely, this computer is a VirtualBox virtual machine that I run on my MacBook Pro.
- download Legato Application Development Kit (also named Legato Development Environment) 16.10.1 for Linux 64 bits from this page
- while downloading, install required Linux packages. For Linux Mint, I have to install build-essential, python-jinja2, ninja-build, lib32z1 and lib32ncurses5
- unzip the archive file
- finish installing Legato by running following command from Legato directory:
./legato-spm --installed --update-link
Legato Development Environment results from the assembly of two main components: Developer Studio, the Eclipse-based IDE (Integrated Development Environment), and Legato, the application framework.
Start Legato Development Environment, enter information requested by the startup wizard.
After a while, Developer studio will display a message about an available update, for Developer Studio 5.1. Install it.
First connectivity test
The mangOH board being connected to the computer with the USB cable, a new network interface (Ethernet over USB) is available. Its IP address is set to 192.168.2.3 while the mangOH IP address is 192.168.2.2.
Note: depending on your Linux configuration, it could happen that the network interface is created, but no IP address is assigned to it. You will realize that you are facing this problem if you can’t SSH into the board, as directed below. To correct this:
- find which network interface was created, thanks to the ifconfig command:
$ ifconfig
enp0s3    Link encap:Ethernet  HWaddr 08:00:27:67:ab:ea
          inet addr:10.0.2.15  Bcast:10.0.2.255  Mask:255.255.255.0
          inet6 addr: fe80::ef54:6da4:3b59:206e/64 Scope:Link
          UP BROADCAST RUNNING MULTICAST  MTU:1500  Metric:1
          RX packets:2739635 errors:0 dropped:0 overruns:0 frame:0
          TX packets:1313190 errors:0 dropped:0 overruns:0 carrier:0
          collisions:0 txqueuelen:1000
          RX bytes:2246513691 (2.2 GB)  TX bytes:89647536 (89.6 MB)

enp0s12u2i19 Link encap:Ethernet  HWaddr 1e:86:2e:4b:33:68
          UP BROADCAST RUNNING MULTICAST  MTU:1500  Metric:1
          RX packets:44 errors:0 dropped:0 overruns:0 frame:0
          TX packets:62 errors:0 dropped:0 overruns:0 carrier:0
          collisions:0 txqueuelen:1000
          RX bytes:11086 (11.0 KB)  TX bytes:8635 (8.6 KB)

lo        Link encap:Local Loopback
          inet addr:127.0.0.1  Mask:255.0.0.0
          inet6 addr: ::1/128 Scope:Host
          UP LOOPBACK RUNNING  MTU:65536  Metric:1
          RX packets:24365 errors:0 dropped:0 overruns:0 frame:0
          TX packets:24365 errors:0 dropped:0 overruns:0 carrier:0
          collisions:0 txqueuelen:1
          RX bytes:9628143 (9.6 MB)  TX bytes:9628143 (9.6 MB)
First network interface is the one that allows my virtual machine to communicate with the host machine. Last network interface is the loopback interface, always present. The second network interface is the one in trouble.
- assign the right IP address to it:
sudo ifconfig enp0s12u2i19 192.168.2.3 netmask 255.255.255.0
Open an SSH session with the board, using root username. There is no password by default, but you are advised either to define one, or to define keys. I choose the password method.
Follow instructions from section 6 of mangOH Fundamentals guide, to connect to a mobile network and test a data connection.
Connecting to AirVantage cloud platform
Follow instructions from section 7 of mangOH Fundamentals guide, to connect to AirVantage, the Sierra Wireless cloud platform.
Coding with Legato
First application: send an SMS with current location
We will start from an existing sample, provided by Legato Development Environment, that sends an SMS containing mangOH board location:
- in the IDE, select File / New / Legato Application
- enter testLocSms (for instance) for Project name and click on Next > button
- on next window page, target platform configuration should be valid, so click again on Next > button
- in the list of samples, tick textLoc and click on Next > button
- in last page, click on Finish button
- in the Project Explorer view, double-click on testLocSms.adef file, in order to display its contents
- set DEST_CELL_NO to your mobile phone number (using the international format, with + sign and country code)
- save the file (with CTRL+S for instance)
- build the project: Project / Build Project
- switch to device perspective: Window / Perspective / Open Perspective / Device (if Device is not displayed, look for it via Other…)
- in the Applications view, click on the Install Application icon:
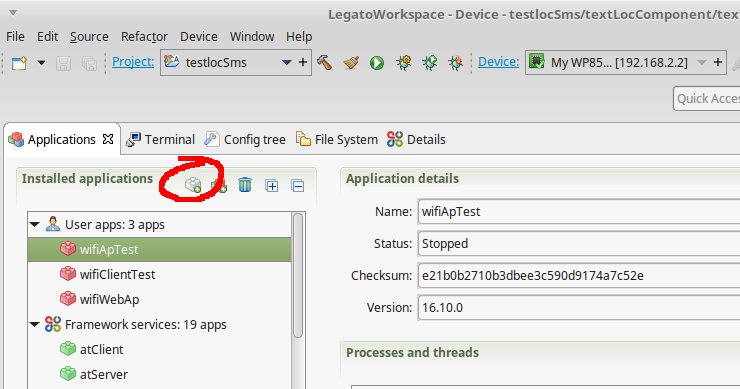
- choose the testlocSms.wp750x.update file from the workspace and click on the OK button
- the application is loaded in the WP module and started
- after a short while, my mobile phone receives an SMS containing my current location
Second application: Legato and AirVantage
The second application is borrowed from the Exchange Data sample application. I follow these steps:
- download the sample code from GitHub
- create an new Legato application project, named assetDataTutorial
- modify project files names and contents in accordance with downloaded sample code. You will get some errors in file assetDataMain.c
- build the project. This step should remove above errors
- login to the AirVantage portal
- go to Develop / My Apps
- click on the Release button:
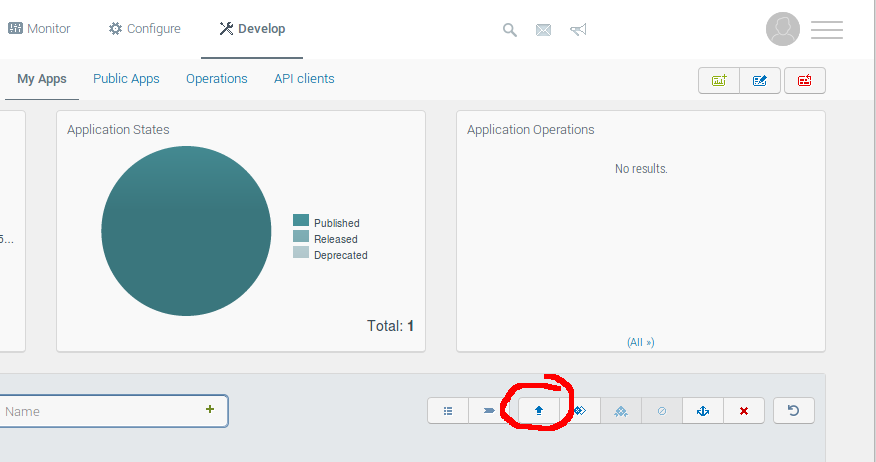
- select the file assetDataTutorial.zip which can be found in the Target_Legato_Debug directory. In Advance settings, tick I want to publish my application after releasing it
- click on Start button
- then go to Inventory / Systems
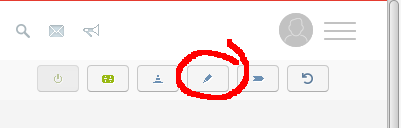
- select mangOH board, and click on the Edit icon:
- using the Applications field, assign the assetDataTutorial application to the board. Click on Save button
- let’s go back to Legato Development Environment: load the application into the board, and start it
- the Logs view should display trace messages similar to these ones:
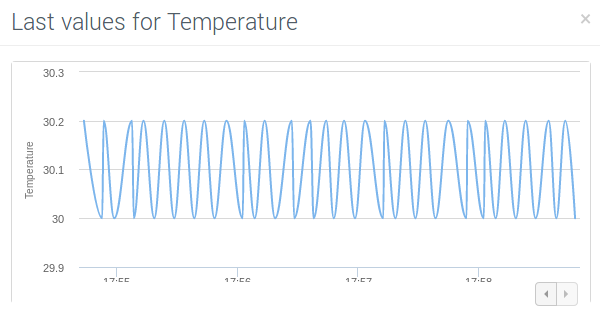
Apr 23 17:48:05 | assetDataTutorial[12878]/componentAssetData T=main | assetDataMain.c updateTemperature() 127 | Legato AssetData: update, bedroom temperature is 30.199997 °C
Apr 23 17:48:05 | assetDataTutorial[12878]/framework T=main | le_avdata_client.c le_avdata_SetFloat() 1091 | Sending message to server and waiting for response : 27 bytes sent
Apr 23 17:48:05 | assetDataTutorial[12878]/componentAssetData T=main | assetDataMain.c updateTemperature() 127 | Legato AssetData: update, living-room temperature is 30.000000 °C
Apr 23 17:48:05 | assetDataTutorial[12878]/framework T=main | le_avdata_client.c le_avdata_SetFloat() 1091 | Sending message to server and waiting for response : 27 bytes sent
One way to display data received by AirVantage is to got to Monitor / Systems, then to click on mangOH board. In the System Applications rectangle, click on assetDataTutorial. Then click on Room and select bedroom for instance. Click on the clock icon to the right of temperature. You get a chart similar to this one: